The inspiration for the snowflake tree came from this. As that part didn't come from me, I wouldn't feel comfortable doing a tutorial on that part (I did provide a link to a tutorial on machine appliqué if you haven't done it before). I've been meaning to do a tutorial on the card holder part ever since I made the Christmas Tree card holder a couple of years ago so here we go...
Finished quilt measures 40" by 40".
Materials:
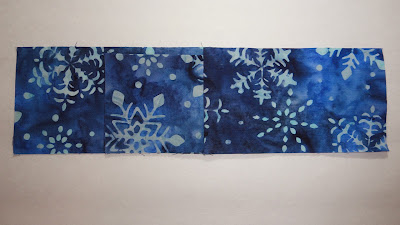
2.25 yards of blue background fabric:

- 64 - 3" by 5.5" rectangles (approx. 8 strips of 3" by the width of fabric (WOF))
- 64 - 3" by 3" (approx. 5 strips)
- 1 - 25.5" by WOF
- Binding - 5 strips of 2.5" by WOF
Fusible web
Snowflake shapes
1.5 yards for the backing and sleeve
1. Fold all the 3" squares diagonally to form half square triangles and press.
2. Fold 16 of the 3" by 5.5" rectangles in half along 5.5" side and press.
3. Take one 3" by 5.5" rectangle and two 3" folded triangles and pin them to the 3" by 5.5" rectangle, raw edges meeting along the outside edges.
4. Stay stitch 1/8" away from the edges.
5. Repeat for the remaining 15 blocks.
6. Sew the 16 block units together in a column.
7. Now to make some one seam flying geese blocks. Take a 3" by 5.5" rectangle and one folded 3" by 5.5" rectangle. Place the folded rectangle along one 3" side so the fold is 1/4" from the top of the 3" by 5.5" rectangle edge.
8. Take another 3" by 5.5" rectangle and place it on top of the first two pieces, making a sandwich.
9. Sew a 1/4" seam allowance along the 3" edge, securing the three pieces together.
10. Press open.
11. Separate the folded piece and pull each corner to make a flying geese. Press.
12. Place a folded HST triangle on each of the corners, overlapping the centre flying geese by a 1/4".
13. Pin and stay stitch 1/8" to secure the triangles.
14. Repeat for the remaining 15 blocks.
15. Sew each the 16 flying geese units together in a column so that you now have your two cardholder columns.
16. Place the pieced columns to either side of your panel.
17. Sew the cardholder sections to your centre panel, which you've added your machine appliqué.
Detail photos:
18. Layer with your batting and backing. Quilt as desired, BUT do not quilt over your cardholder pockets. And your sleeve and bind.
And there you have your Holiday card holder!
What's on my Making Christmas list?
1. Finish this wallhanging for one!
2. A Lego bag for my niece.
3. Pillowcases for my boys.
4. Finish the Scrappy Trip quilt for my eldest.
5. Prep Bottled Rainbow blocks for a quilt to make with my youngest during the holiday break.
What's on your list? Link up your list and let's cheer each other on!
Have a great weekend!


Wow that is really cool!
ReplyDeleteLove the snowflake appliqué.
ReplyDeleteWhat a great way to display the cards. Thanks for the tutorial.
ReplyDeleteSuch a beautiful way to display cards! Love the snowflake tree!
ReplyDeleteWhat a fabulous idea!
ReplyDeleteYour snowflake tree is beautiful! Thanks for this wonderful tute :)
ReplyDeleteClever!
ReplyDeletecrafters have to move right in to Christmas if they're not already there, don't they?! the snowflake tree is a nice touch.
ReplyDeleteWhat a cute way to display those Christmas cards. Is it just me, or do people seem to send less Christmas cards than they used to?
ReplyDeleteVery clever gift card holder for giving. Thank you for sharing. Creative Christmas Joy...
ReplyDeleteWhat a cool way to store the cards! Every year I have come up with a new method of displaying them...I will have to try this...
ReplyDeleteOh, that's very clever! I never thought of "reversing" the one seam/3D goose into a pocket form.... very cool!
ReplyDeleteWhat a wonderful idea. Thanks for sharing!
ReplyDeleteI love your white snowflake tree on that lovely blue background! Great way to display those Christmas cards.
ReplyDeleteThis is very cool! I love the use of the flying geese here - simple and genius!
ReplyDeleteSuch a fantastic idea M-R. Thanks for the tute! :)
ReplyDeletethank you for this tutorial! I've been wanting a card holder for our wall and now I'm making it! thanks for sharing & great job! aimee
ReplyDelete