

My block in the sampler features trapunto. Trapunto, which comes from the italian term "to embroider", is a stuffed quilting technique that gives great texture to quilts.
This trapunto technique used to intimidate me -- mostly because I'd see in in fabulous heirloom quilts and think that there's no way I could do that. Having done it a couple of times now, I can safely say that there is nothing to be afraid of and I'm going to show you how to do it so you can say the same.
Please read all the instructions of the tutorial before beginning.
 |
| Fabric for block |
1 - 3.5" x 16" background colour (I chose white)
1 - 5.5" x 16" background colour (white)
Scraps of 1.5" wide fabric to create a 1.5" by 16" strip
Water soluble thread (I use YLI Wash-A-Way Water Soluble Thread)
Water soluble pen (I use Unique)
2 pieces of 4" x 13" batting
Batting and backing for your block/quilt
Instructions:
1. Sew your scrap centre strip together until it reaches 1.5" by 16" and lay out your block pieces as shown in the photo, with the 3.5" x 16" background piece on the left and the 5.5" x 16" background piece on the right of the coloured strip.
 |
| Block layout |
2. Sew your block together and make sure the bottom is square to your coloured stripe.

3. We are now going to mark the squares for the trapunto. You can do a design of your choice -- just make sure that the motif is a closed one. For the purposes of this tutorial, I did three square frames. To make the square frames, place your ruler 1/2" to the left of your coloured stripe and, measuring from the bottom of the block, mark from 3" to 5", 7" to 9" and 11" to 13" with your water soluble marker.

4. Placing your ruler 1" to the left of your coloured stripe and measuring from the bottom, mark from 2.5" to 5.5", 6.5" to 9.5" and 10.5" to 13.5" using your water soluble marker.

5. Repeat the same markings for the right side of the coloured stripe.

So your block now looks like this.

6. Connect your lines so you are making three square frames.


7. Now you are ready to do the trapunto. Layer your two 4" by 13" pieces of batting behind the squares (no backing yet) and baste.


8. With the water soluble thread as your top thread and regular thread in the bottom, sew along your marked lines. NB: Using water soluble thread gives a cleaner final product, but if you don't mind thread build up and can sew well on top of another thread, you can use regular thread, if you like.
 |
| Water soluble thread on the top |
 |
| Regular thread (white/off-white on the back to blend in with the batting) |
9. Once you've sewed all the squares, carefully trim away the excess batting from around the squares. I remove one layer of batting at a time. It is easy to nick the front of your block, so take your time with this step.


10. Next, carefully pull the centre batting away from the block top and cut away the batting from the centre of the squares, leaving a frame.


At this point, you could trim up your block to 7.5" by 14.5" and attach it to your remaining sampler blocks. However, this is not the end of the trapunto process.
I've finished the block to show you how to finish the trapunto. Because I've finished my block, I'll be doing my sampler quilt as quilt-as-you-go instead, which is an option for you as well, but it means you need to quilt all of your sampler blocks before attaching them.
11. If you are doing quilt-as-you-go, layer the top of your untrimmed block on your batting and backing and baste. The quilting will shrink the block so you want to wait until you have finished the trapunto process before trimming. If you've sewed your trimmed block into your quilt top, layer your quilt top on your batting/backing and baste.

12. Using the quilting thread of your choice (not the water soluble!), sew over the water soluble thread to secure the extra batting between your block top and batting/backing.


13. The trapunto looks best if the quilting around it is quite tight or dense. Quilt the rest of your block/quilt as you wish. Here are some options I sketched out using trial quilting sheets.


My quilted block, using Aurifil 2021 (40wt):
 |
| Front |
 |
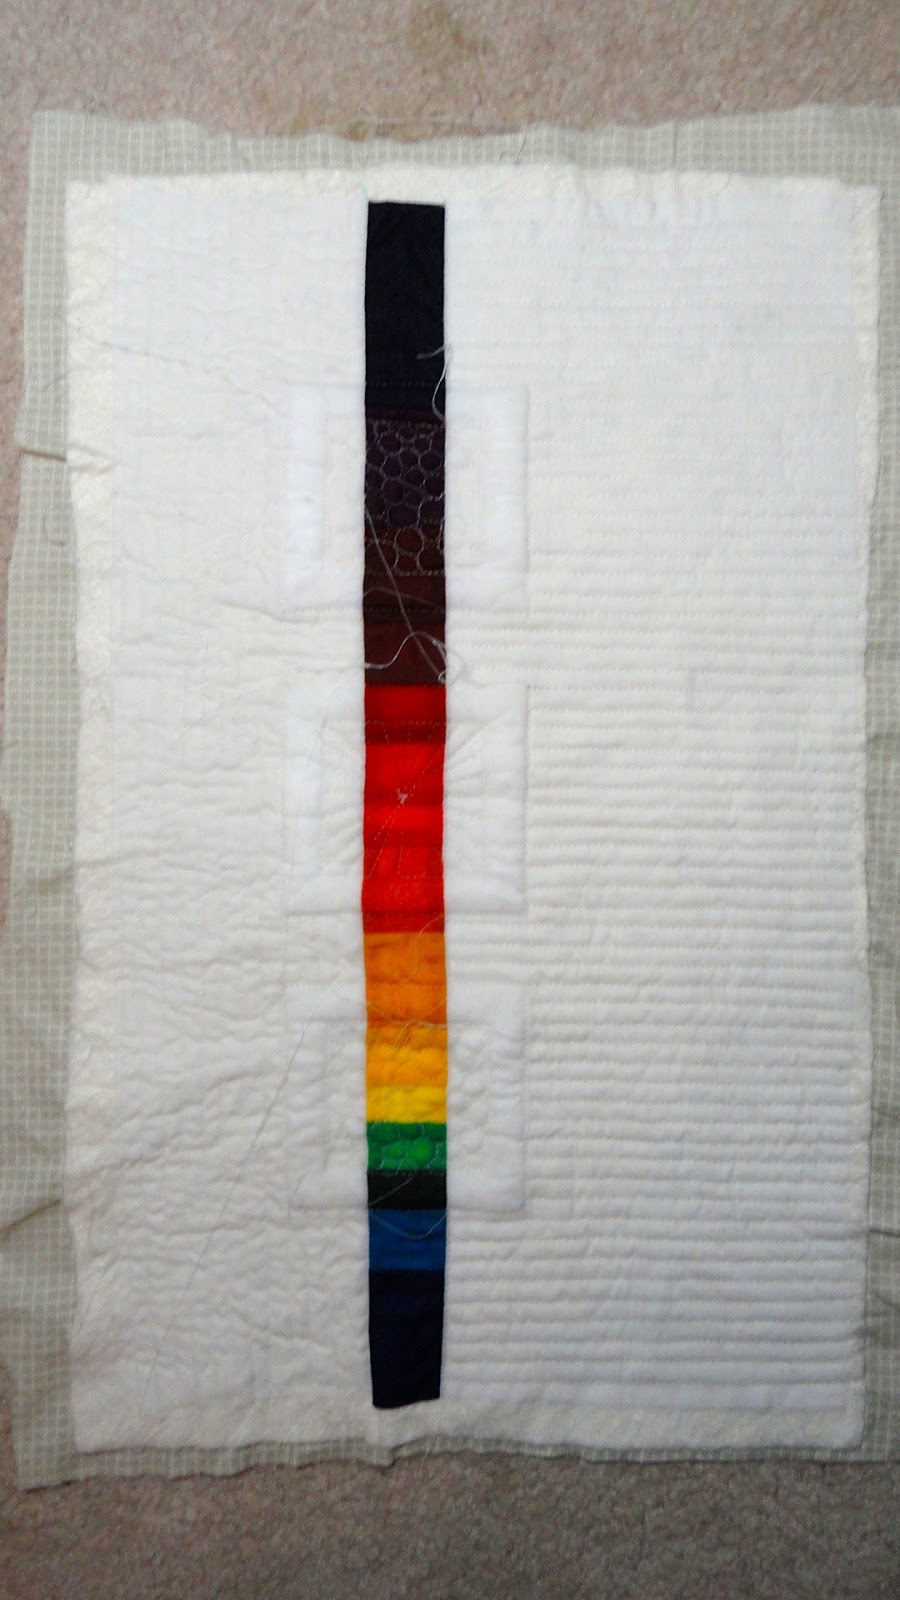
| Quilted Block - Back |
14. Once your block/quilt is quilted, it's time to removed the water soluble thread and marker. Soak in water and lay flat to dry on a towel.

15. When your block/quilt is dry, trim or square it up to 7.5" by 14.5". Voilà -- you've made a trapunto block! Not so scary, eh?
 |
| Finished trapunto block |
 |
| Detail of the trapunto |
If you have any questions about this tutorial, you can post them here or in the Flickr discussion thread.
Don't forget to post a photo of your block to the Flickr group so we can see what you've done. Also, be sure to check out Heidi @ Fabric Mutt's block this week too -- she's showing you how to do cathedral windows!


Great tutorial!! I was experimenting a little bit with trapunto this week and want to do some more so this is perfect timing!
ReplyDeleteThanks!
Great tute. Much more straightforward than I'd have thought. I'll give this a try :)
ReplyDeleteI've always wondered about this effect. Thanks for sharing the tutorial! I might have to think up a project to use this in. :)
ReplyDeleteGreat tutorial. Consider it pinned! I need to save this for when my Modern Mini Mystery Round Robin 2013 returns home. Thank you!
ReplyDeleteWell you explained that really well M-R...and it looks great
ReplyDeletegreat tute!! what's wrong with using regular thread on the trapunto part? or is that just a prefernce thing?
ReplyDeleteHi Bea, great question! Using water soluble thread gives a cleaner final product and less thread build, but if you don't mind thread build up and can sew well on top of another thread, you can use regular thread, if you like. I've updated the post with this info in case others have the same question.
DeleteCheers,
M-R
That definitely looks doable, I look forward to giving trapunto a try!
ReplyDeleteGreat tutorial! I will definitely try to make this block: I see a nice pillow! I love the coloured stripe!
ReplyDeleteHoly cow- THAT's brilliant!!!!
ReplyDeleteThis is absolutely stunning!! Beautifully done and explained!
ReplyDeletethis is the best trapunto tute! makes me feel i can do this. thanx muchly ... i can give it i try now.
ReplyDeleteGreat tutorial....thanks so much.
ReplyDeleteThat's beautiful!
ReplyDeletegreat tutorial M-R - I may have to try it!
ReplyDeleteI have always wanted to learn this technique so thanks for a really straightforward tutorial.
ReplyDeleteooh thanks for this!
ReplyDeleteI also have been intimidated by trapunto but after reading this I may give it a try, thank you somuch
ReplyDeleteLoved making this up for the Something NEW Sampler - I think it's my favourite block I've ever made - thanks :)
ReplyDeleteHey! Hope your wrist is doing better. Just enjoyed your quilts over at Quilt Inspiration. Still drooling over the rainbow and the sea!
ReplyDeleteWow - fabulous. You make it look so easy and I love the quilting. Will definitely be trying this.
ReplyDeleteJust finished this block and love it, I will be doing the QAYG method so will do the quilting soon. You explained it really well. Thanks so much. I didn't have any water soluble thread so just used ordinary cotton. I think it looks ok. Cheers
ReplyDeleteThanks for the tutorial M-R!! I have made one and blogged here http://viewfromourhill.blogspot.co.uk/ Really rather please with it!
ReplyDelete